
Modifying CSS with JavaScript
You already know how to select an element and change what it says. Now let's make it change what it looks like.

Key topics
You already know how to select an element and change what it says. Now let's make it change what it looks like.
Imagine a button that turns blue when you click it. Or a form error message that shifts from gray to red the moment something goes wrong. That kind of live visual feedback is exactly what JavaScript is for.
The core idea is simple: every element on your page exposes a style object, and you can write to it from JavaScript at any moment.
See it work first
Let's start with something you can copy, paste, and run right now. Create an HTML file with this:
<!DOCTYPE html>
<html>
<body>
  <p id="message">Hello there</p>
  <button id="colorButton">Turn it red</button>

  <script>
    const button = document.getElementById('colorButton');

    button.addEventListener('click', function() {
      const message = document.getElementById('message');
      message.style.color = 'red';
    });
  </script>
</body>
</html>
Open that file in your browser and click the button. The paragraph text turns red.
That's the whole pattern: select an element, then set a style property on it. The addEventListener('click', ...) part simply means "run this code when the button gets clicked." You'll learn more about events soon, but for now, just know that the style change happens after the click.
What you're doing is writing an inline style, exactly as if you had written this in your HTML:
<p id="message" style="color: red;">Hello there</p>
The difference is that you're doing it from JavaScript, which means you can do it at any moment — after a click, after a timer, after data arrives from a server.
The style property: your direct line to an element
Every DOM element has a .style property. This property gives you access to the element's inline styles — the same styles you'd write in a style attribute directly on the HTML element.
const message = document.getElementById('message');
message.style.color = 'red';
That's it. The text turns red.
Knowledge check
Check your understanding
Answer this question before you continue.
CSS names vs. JavaScript names
Here's the first confusion every beginner hits.
In CSS, property names use hyphens:
background-color
font-size
margin-top
In JavaScript, those same properties use camelCase — no hyphens, and each word after the first starts with a capital letter:
backgroundColor
fontSize
marginTop
Why the difference? Because a hyphen in JavaScript means subtraction. Writing style.background-color would look like you're trying to subtract something named color from something named background. The language needs a different convention, so it uses camelCase instead.
| CSS property | JavaScript style property |
|---|---|
background-color | backgroundColor |
font-size | fontSize |
margin-top | marginTop |
border-radius | borderRadius |
text-align | textAlign |
This is the mistake I see beginners make more than any other. They write element.style.background-color and wonder why nothing happens. The fix is always the same: drop the hyphens and capitalize the next word.
// This causes a JavaScript error:
message.style.background-color = 'yellow';

// This works:
message.style.backgroundColor = 'yellow';
Notice that the first line doesn't fail silently. The hyphen makes JavaScript read the expression as subtraction, and the assignment throws a syntax error. If you see an error in the console, check your property names first. That's usually the culprit.
Knowledge check
Check your understanding
Answer this question before you continue.
Setting multiple styles at once
Setting properties one by one works, but it gets repetitive when you want to change several things at once:
const box = document.getElementById('box');
box.style.backgroundColor = 'blue';
box.style.color = 'white';
box.style.padding = '20px';
box.style.borderRadius = '8px';
When you need to set a batch of styles, you can use cssText. This property lets you assign the entire style string at once:
const box = document.getElementById('box');
box.style.cssText = 'background-color: blue; color: white; padding: 20px; border-radius: 8px;';
Notice that cssText uses regular CSS syntax with hyphens. It's a string, not a JavaScript property name.
Here's the important warning: cssText replaces all existing inline styles. It doesn't add to them. If the element already had an inline style, that style gets wiped out.
// The element starts with style="color: black;"
box.style.cssText = 'background-color: blue;';

// Now the element only has background-color: blue.
// The original color: black is gone.
So use cssText when you're setting up a fresh set of styles and you know what you're replacing. Use individual properties when you're making one targeted change to an element that already has inline styles you want to keep.
Knowledge check
Check your understanding
Answer this question before you continue.
Common beginner mistakes
Let me save you the debugging time I've watched beginners burn. These four mistakes account for almost every "why isn't my style changing?" moment.
Forgetting units. Many CSS properties need a unit, and JavaScript won't add it for you:
// Doesn't work:
box.style.width = 100;

// Works:
box.style.width = '100px';
The value needs to be a string with the unit included.
Using CSS names instead of camelCase. We covered this above, but it deserves repeating because it's the most common source of errors. When you see a syntax error, check your property names before anything else.
Expecting .style to read styles from CSS classes. The .style property only sees inline styles. If your styles come from a CSS file or a <style> block, .style won't show them:
<style>
  .highlight { background-color: yellow; }
</style>

<p id="note" class="highlight">Styled by CSS</p>
const note = document.getElementById('note');
console.log(note.style.backgroundColor); // Outputs an empty string
The element looks yellow, but .style can't see it because the style came from a class, not from the inline style attribute. To read the actual computed style, you'd need a different tool called getComputedStyle — but for now, just understand that .style is for writing inline styles.
Setting a style on the wrong element. If your selector doesn't match anything, document.getElementById returns null, and trying to set a style on null throws an error. Check that your id matches and that your script runs after the element exists in the page. In the example above, the <script> tag sits at the end of the <body>, so the elements already exist when the code runs.
Knowledge check
Check your understanding
Answer this question before you continue.
When to use JavaScript styles vs. CSS classes
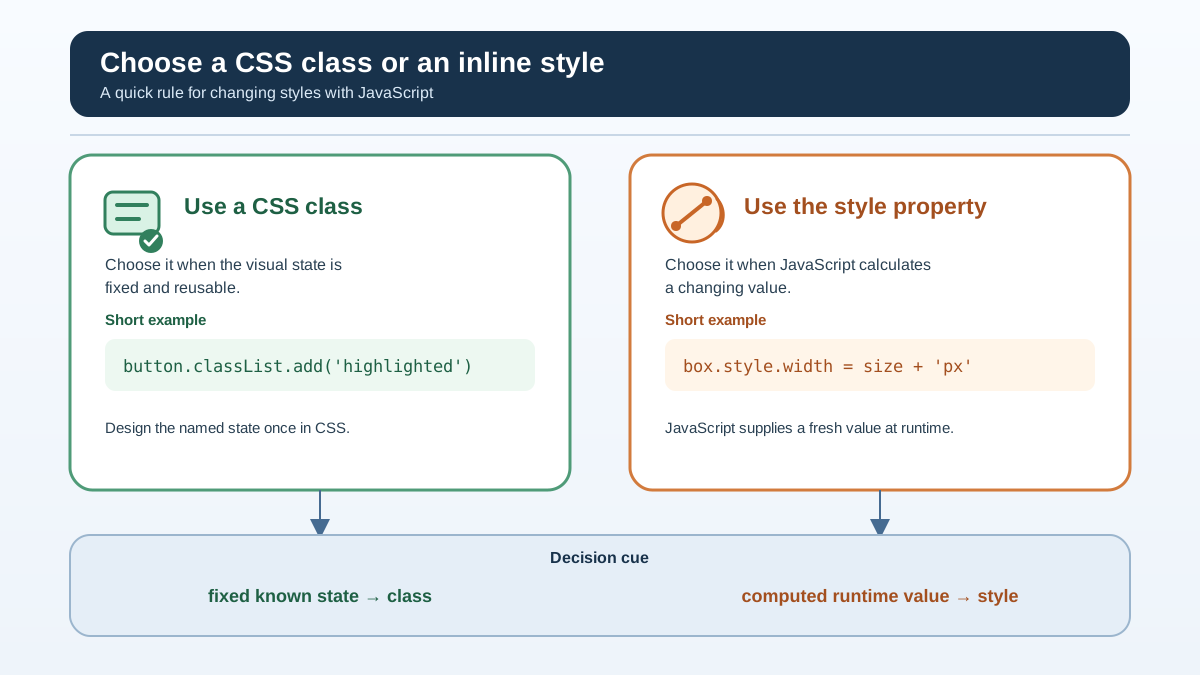
Here's a decision rule that will serve you well: prefer CSS classes for fixed style changes, and use JavaScript styles for values you compute at runtime.
If you want to highlight an element when someone clicks it, define a .highlighted class in your CSS:
.highlighted {
  background-color: yellow;
  font-weight: bold;
}
Then toggle that class with JavaScript:
element.classList.add('highlighted');
That's cleaner than writing five separate style lines in JavaScript. The styles live in your stylesheet where they belong, and your JavaScript just flips a switch.
But JavaScript styles are the right call when the value doesn't exist until runtime. For example, if you're positioning an element at coordinates you calculated:
element.style.left = calculatedX + 'px';
element.style.top = calculatedY + 'px';
You can't write that in a CSS class because you don't know the values until the moment they're needed. That's when the style property earns its keep.
My rule: if the style change is a fixed, known state, use a class. If the style depends on data, timing, or user input, use the style property.
Practice: build a color-changing button
Let's put this together with a small exercise.
Goal: A button that changes its own background color when clicked.
Here's your starter HTML:
<button id="colorButton">Click me</button>
And here's a JavaScript skeleton to fill in:
const button = document.getElementById('colorButton');

button.addEventListener('click', function() {
  // Your code here
});
Your task: inside the click handler, change the button's background color. Remember the two things that matter — the style property and camelCase naming.
Expected behavior: When you click the button, its background color changes. If you set it to blue, the button turns blue and stays blue.
Hint: You need button.style.backgroundColor and a string value.
Optional extension: Change the text color too. Or go further: make the button cycle through several colors, changing to a new one each time it's clicked.
Where to go next
You now have the core mental model: the style property is your runtime handle on how an element looks. When you need to change an element's appearance after the page is live, you reach for it.
The natural next step is learning more about the events that trigger these changes — clicks, key presses, form submissions. That's where the real power shows up: a page that responds to what your users do.
And when you're ready to write cleaner code, come back to the class-toggle approach. The best JavaScript developers don't style everything inline. They use classes for what's fixed and reserve the style property for what's truly dynamic. Both tools belong in your kit.
Knowledge check
Final check
Finish the article by checking the ideas you just learned.
References
Research updated Sep 6, 2026


